Showing posts with label class. Show all posts

Wednesday, September 18, 2019

Lampwork Glass - More Dots! Bead Class (06Feb2019) - Part 2

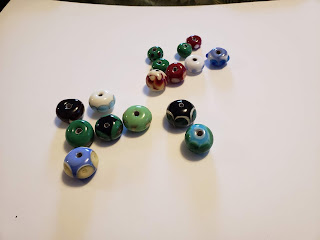
Finally getting back to this post and logging all the work we did from this class.  My beads are on the left and Sergei's giganto-beads are on the right.


Dot placement and scaling:

This part of the class was mostly getting back into the practice of placing dots on the bead.  We working on angling the dots along the top and bottom of the bead.  Something that was very helpful - when placing dots, do so slowly and if you think you miiiiight be able to squeeze in two dots into a space, the reality is you probably should only put one.


Stacked dots:

This is putting one dot on top of another dot.  This works best if you stack a dark color on top of a lighter one.  The stacking bead below was one of my favorites of the day.  This was a little weird as I kept the bead out of the flame too long at some point and the bead actually cracked during the dot process.  I was able to remelt the bead to close the crack well enough to finish the bead.  The instructor was impressed and said "Well, you can enjoy it for a while at least.  Nice save!"


My green bead also shows different dot placement as well as stacked dots.

This was my favorite bead.  You can see the cracks in the bead release in two places.


Pierced dots:

This is the same process of making normal dot except they are poked with a stylus.  Left as is, they sort of look like an octopus sucker.  Alternatively when you add a transparent glass dot over it, it created a trapped "bubble" effect.  It's really neat.


Masking:

Masking is where you add overlapping dots (of the same base bead color) over an existing dot to create a shape.  It's easiest to make crescents, but you can keep layering and masking to created all different shapes.  This was at the tail end of our class.


Wednesday, May 8, 2019

Lampwork Glass - More Dots! Bead Class (06Feb2019) - Part 1

After almost a year out of the studio, this was Sergei's Christmas present from me.  This is also my first foray back into glass works post-baby and without carpal tunnel. (for the record, doing this without wrist braces is waaaaaay easier)

This class titled "More Dots" was the advanced bead class offered at Fiamma Glass Studio.


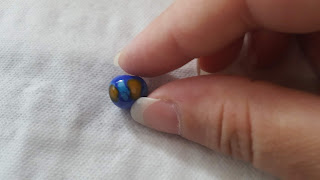
Above is the finished beads.  Sergei's are the large beads in the front, mine are the smaller ones in the back.  I joke that he made "him-sized" beads and I made "me-sized" beads.  You can see the scale difference in the picture below while they are in my hand.


Feilinn's beads (tiny)
Sergei's beads (not tiny)


Topics covered in this class were:

- Dot placement and scaling
- Stacked dots
- Raised dots vs Smooth dots
- Pierced dots / "Bubbles"
- Masking


I'll go over the various techniques with accompanying picture examples in my next post.


Saturday, August 18, 2018

Lampwork Glass - Imbedded Opal Class (05May2018)

This was our first level 2 class that pigged backed off the information we learned in the intro pendant making class.  The focus here was learning about encasing opals in glass and using them in pendants.


This followed the same process as making pendants.  The initial pendant glass used this time was a follow borocilicate glass.  The end was sealed then heated so the tube slowly filled up with liquid glass.  The opal was then dropped in carefully and the glass heated and rotated to prevent air bubbles forming in the tip of the pendant.  A contrasting color was added to the back of the pendants to better show off the opal.

This was the handout provided in the class.  It gives a quick background on Gilson opals and describes the embedding process with some neat pictures.

Gilson opals are commercially available at Profound Glassworks (http://www.profoundglass.com/store/pc/viewCategories.asp?idCategory=2) and where the class supply was from.


Lampwork Glass - Pendant Making (21Apr2018)

This intro class was taken at Fiamma Glass again.

This class differed from the bead making in a few different ways.  The glass used here was borosilicate glass (~30 COE) in solid rods.  No mandrels were used this time around.  Glass was manipulated on the rod of origin or using a glass punty (a glass rod used to transfer your work).  Borosilicate or boro glass isn't as "soft" as moretti glass so you don't have to worry as much about gravity until you have a large "glob" of melted glass.  Glass is then flattened by using either a press or by touching the heated glass to a metal plate and pressing down.

To create a two color swirl effect, a blob of a secondary color is added to the main piece (after securing a punty to one end).  The glass is heated and then the punty and main rod are twisted in opposite directions.  To get a tapered effect, heat one end of the glass blob and gently pull both rods apart.

Cold seal - Adding a non-heated end of glass to a hot piece of glass.  This created a brittle, temporary "joint" to manipulate the glass you are working with.  The finished piece can be detahed by hitting the glass sharply at the joint.

Chill-marks - A fingerprint-like impression in the glass caused by touching hot glass to a cold surface such as a press plate.  These can be removed by gently heating the piece.

These were our two pendants created in the class. The leaf shape was done by the stretching process described above and then a leaf impression press was used to get the veining.

Feilinn's pendants:


The light blue glass looks more clear after firing and setting in the kiln.  The "dots" of color in the leaf pendant didn't stretch as much as I had hoped either.


Sergei's pendants:


He had one of his "dots" on the flat pendant break off during firing.  When added raised dots, you use the same process as described in the bead making class but just do a gentle firing to even the dots to nice half circles sitting on the pendant flat.  If the dots are not partially melted on correctly, they can pop off or set oddly when firing.

Saturday, June 9, 2018

Lampwork Glass - Bead Class (25Mar2018)

To make a long story short, my husband Sergei got very interested in trying his hand at making lampwork beads.  While he began gathering supplies to "try it out", I took the initiative to find some sort of instructional class where he could try it out before I spent a boat load of time and money on something he liked the concept of.  For his birthday, I got him lessons at a local glass studio.

This is the first part in the multi-part series of posts logging out glass making adventures.  All classes were taken at Fiamma Glass Studio (http://www.fiammaglass.com/) in Waltham, MA with their kick ass staff of teachers and enablers.  These posts will be half recap of what we did and half resource record for my own use.

Glass beads use "soft" glass rods known as Moretti glass (named for a family in Italy) which have a high coefficient of expansion (~104 COE).

Materials:
- bead release
- graphite mandrel
- moretti glass

After a basic instruction on flame safety and two very poignant reminders ( #1 - point hot glass AWAY from you when you put it down and #2 - don't grab the broken ends of glass, grab the middle since it's not sharp), we were away with creating beads.

The mandrel always needs to be turning (either overhand or underhand grip) and is held in your off hand.  It's usually held outside/behind the flame while you head your glass in the hotter part.  Once the glass is hot enough, the rod is turn perpendicular and glass is applied through the flame to the mandrel (which the mandrel turns away from you).  Since the glass is soft, it needs to be constantly turns unless you want gravity to pull the glass blob a certain way on the mandrel. Once you have "enough" glass on your mandrel, you move it away and "cut" it using the flame.  Keep turning the mandrel to even out the bead and use gravity if needed.

Best practice when applying glass to your mandrel is rotate the mandrel away from you so you make a cleaner application and cut.  Otherwise you will end up with a blob of hot glass which will take some time to work into a decent looking bead.

Adding dots

Like adding glass to the mandrel, you instead do a light touch to the already formed bead and pull away (cutting the glass with the flame).  A little glass goes a long way.  Dots can also be layered on top of each other after smoothing in the flame.

Adding lines

Instead of manipulating the glass in your dominant hand, you turn the bead in your non-dominate hand perpendicularly before adding the glass line.  A little goes a long way. Make sure to draw the line down the bead, not up.


Finished beads:

Feilinn's finished beads - 1 solid color, 1 dots, 1 "lines"


Tiny dots were the way to go.

My lines kinda suck and look like terrible "dots".


Sergei's finished beads: 2 solids, 2 dots


Large dots tended to run into each other.


Moretti glass, borosilicate glass, and supplies can be bought at Mountain Glass Arts (http://www.mountainglass.com/).