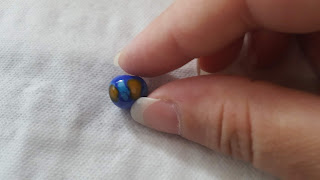
This is the first part in the multi-part series of posts logging out glass making adventures. All classes were taken at Fiamma Glass Studio (http://www.fiammaglass.com/) in Waltham, MA with their kick ass staff of teachers and enablers. These posts will be half recap of what we did and half resource record for my own use.
Glass beads use "soft" glass rods known as Moretti glass (named for a family in Italy) which have a high coefficient of expansion (~104 COE).
Materials:
- bead release
- graphite mandrel
- moretti glass
After a basic instruction on flame safety and two very poignant reminders ( #1 - point hot glass AWAY from you when you put it down and #2 - don't grab the broken ends of glass, grab the middle since it's not sharp), we were away with creating beads.
The mandrel always needs to be turning (either overhand or underhand grip) and is held in your off hand. It's usually held outside/behind the flame while you head your glass in the hotter part. Once the glass is hot enough, the rod is turn perpendicular and glass is applied through the flame to the mandrel (which the mandrel turns away from you). Since the glass is soft, it needs to be constantly turns unless you want gravity to pull the glass blob a certain way on the mandrel. Once you have "enough" glass on your mandrel, you move it away and "cut" it using the flame. Keep turning the mandrel to even out the bead and use gravity if needed.
Best practice when applying glass to your mandrel is rotate the mandrel away from you so you make a cleaner application and cut. Otherwise you will end up with a blob of hot glass which will take some time to work into a decent looking bead.
Adding dots
Like adding glass to the mandrel, you instead do a light touch to the already formed bead and pull away (cutting the glass with the flame). A little glass goes a long way. Dots can also be layered on top of each other after smoothing in the flame.
Adding lines
Instead of manipulating the glass in your dominant hand, you turn the bead in your non-dominate hand perpendicularly before adding the glass line. A little goes a long way. Make sure to draw the line down the bead, not up.
Finished beads:
Feilinn's finished beads - 1 solid color, 1 dots, 1 "lines"
 |
| Tiny dots were the way to go. |
 |
| My lines kinda suck and look like terrible "dots". |
Sergei's finished beads: 2 solids, 2 dots
 |
| Large dots tended to run into each other. |
Moretti glass, borosilicate glass, and supplies can be bought at Mountain Glass Arts (http://www.mountainglass.com/).

